
Follow this Guide for Using Infrared OdaLog Data Loggers
Microsoft recently removed the IrDA feature from Windows 10. It is easy to re-add this feature if you need to use an IrDA dongle. The following steps will add the feature and allow the IrDA device to properly install the device drivers and start the device operation.
Step 1. Open the Windows 10 “Settings” window
a. This is done by clicking the gear icon in the “Start” menu. The window will look like this:
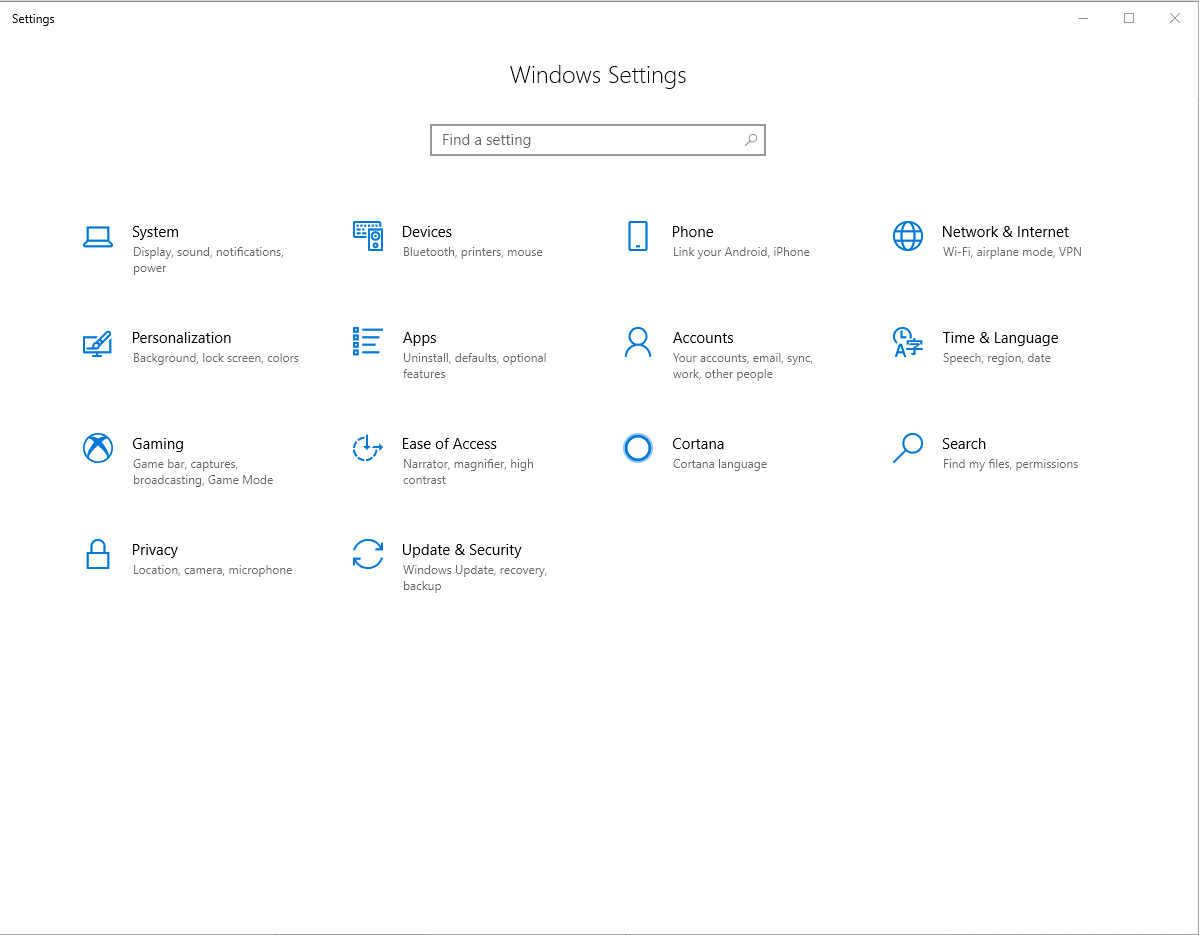
Step 2. Select “Apps” on the Settings page
Step 3. Click on “Apps and Features” in the left-hand column of the window
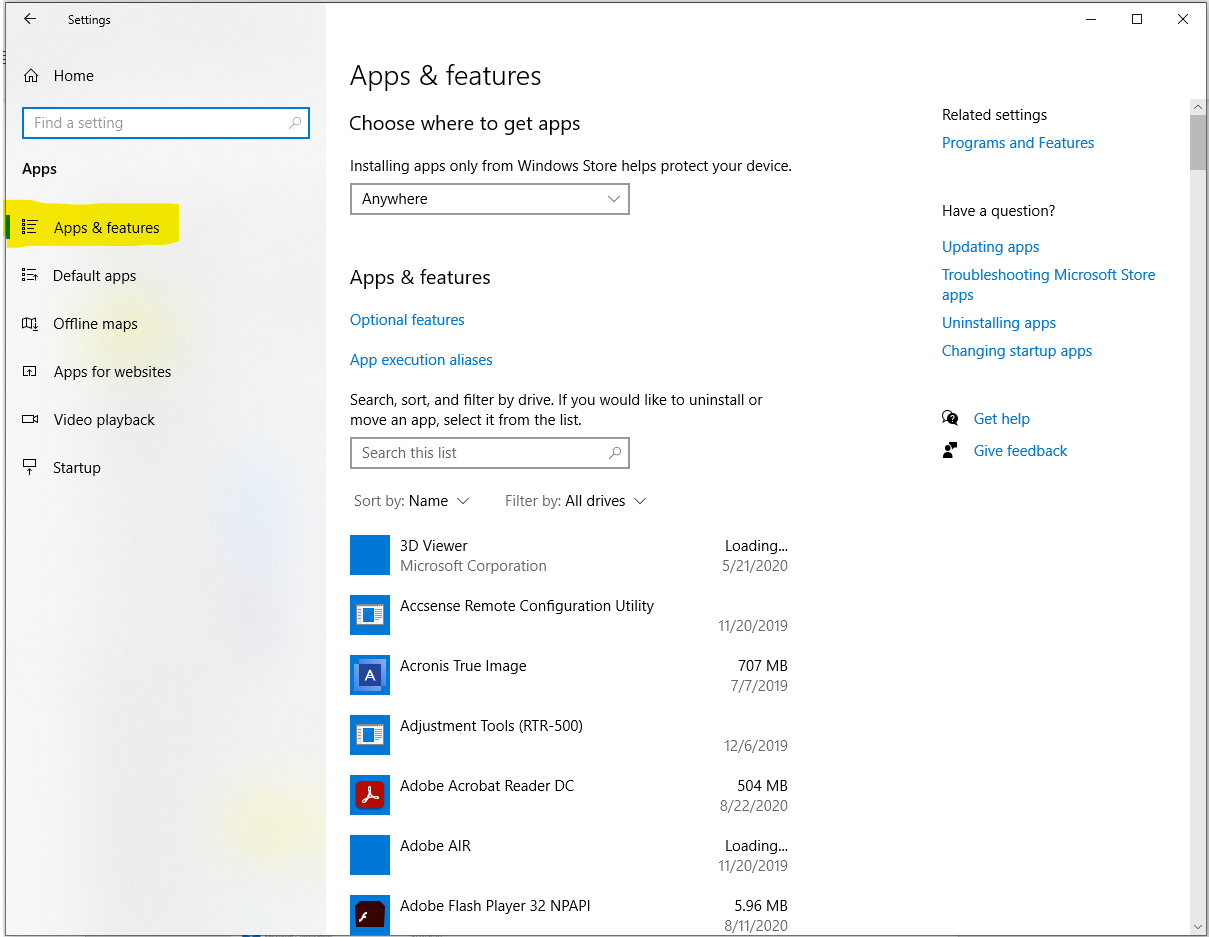
Step 4. Choose “Optional Features”
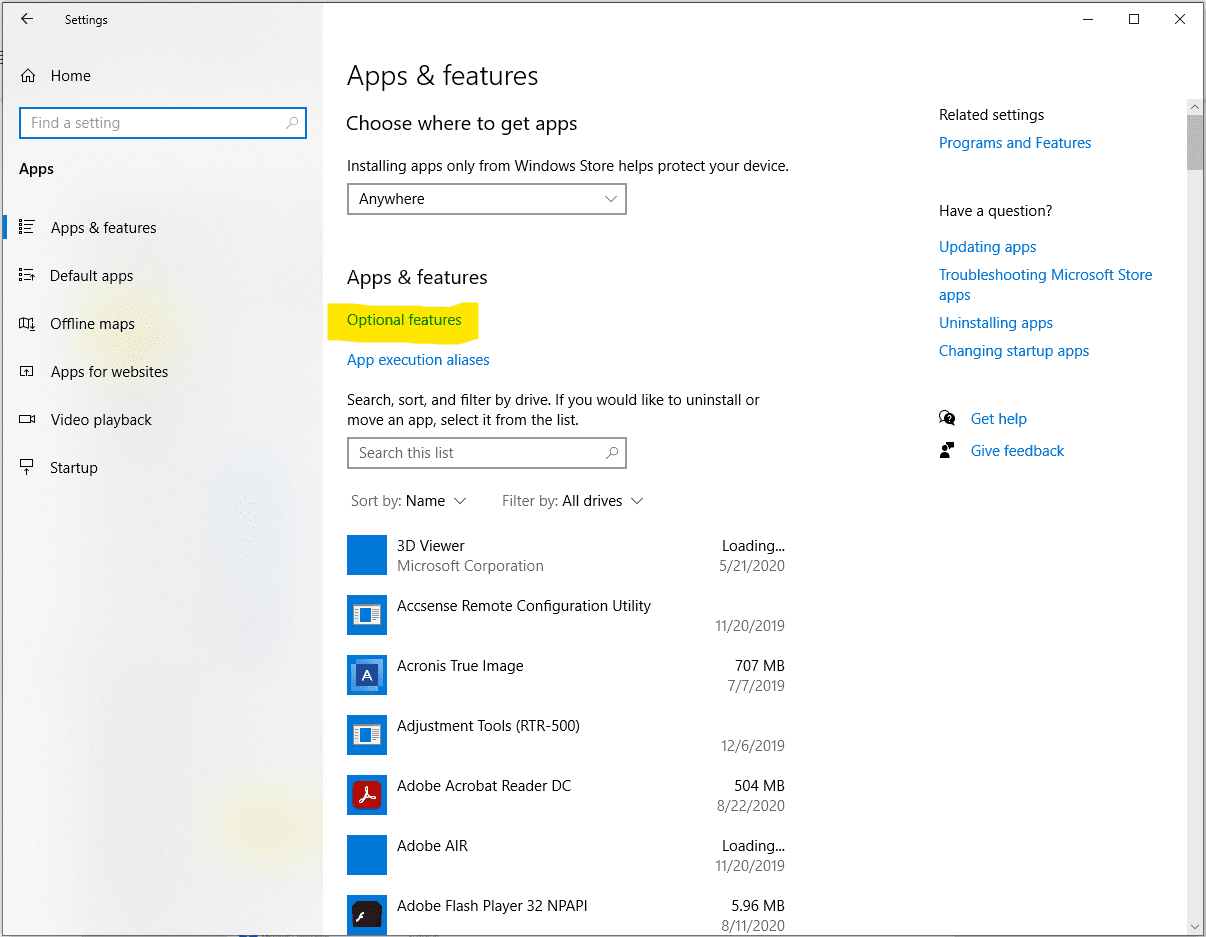
Step 5. In the new window, select “Add a feature”
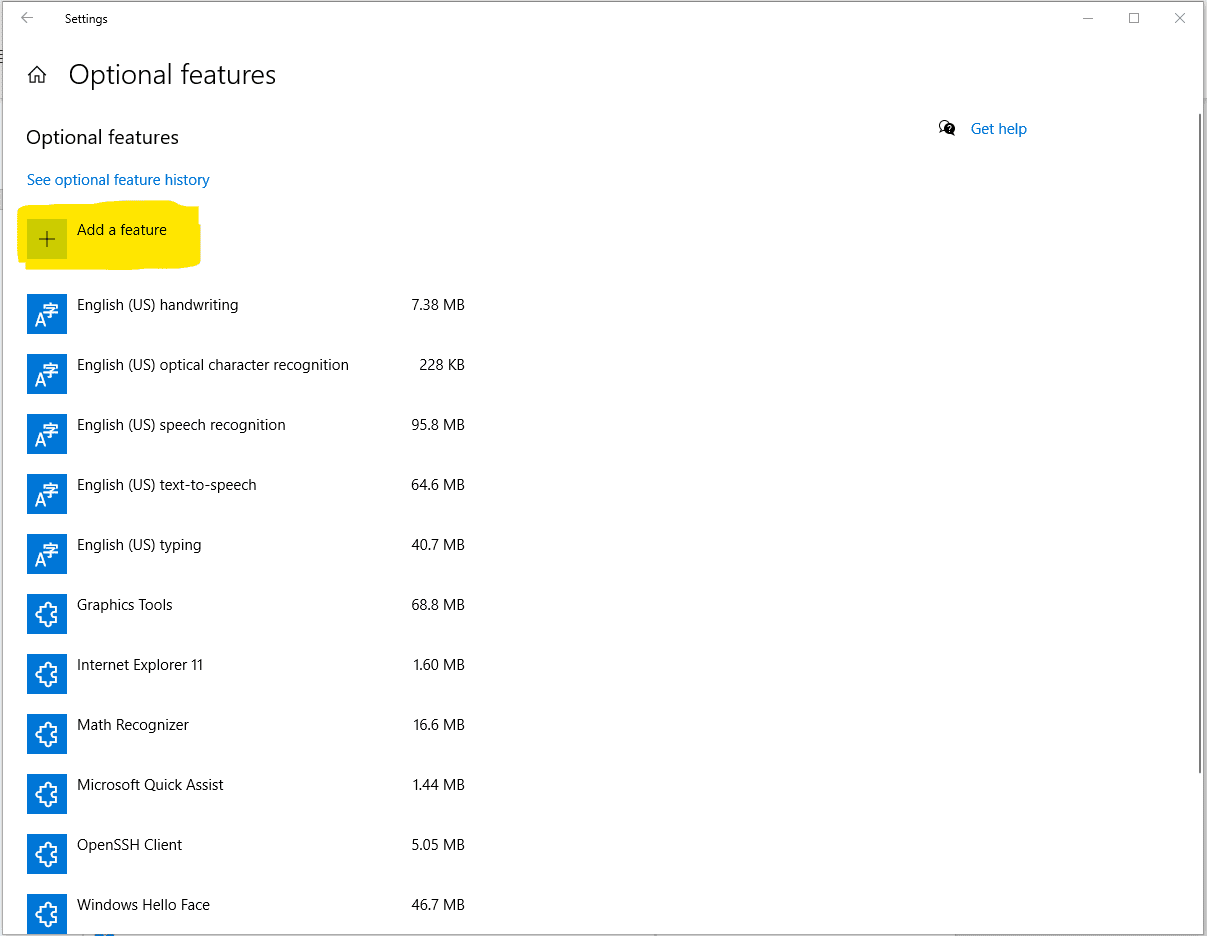
Step 6. In the list that appears, choose “IrDA infrared”

After the IrDA feature is added, go into the Windows “Device Manager” and make sure the drivers for your device are properly installed, and that the device is started. If there are any issues with the device itself, make sure the right driver is installed, and reboot your PC. After that, everything should work for you.
For further information on setting up an IrDA dongle with Windows 10, contact a CAS Data Logger Technical Specialist at (800) 956-4437 or request more information.
